How to simulcast live streams with AI subtitles to YouTube
Clevercast supports simulcasting of live streams with AI generated subtitles that are burned into the video stream. By using this feature, you can send a live stream to YouTube (or other social media) with accurate subtitles in any language.
In this scenario, you will send your RTMP broadcast to Clevercast (instead of YouTube), which will add the AI subtitles and broadcast the augmented stream to YouTube. This tutorial explains how to do this.
Important: this requires that you have an AI Multilingual plan with at least one simulcast target (optional).
1 Creating an event
Select the Live > Events menu. On the events page, press the Create Multilingual Event button in the sidebar. In the popup dialog, enter the following info and press Create:
- an event name (for your own information only)
- select an SRT or RTMP broadcast protocols with support for AI
- select your Broadcast Origin
- select the Default Language. This is the language being spoken in the live stream, which will also be the first closed caption language. If the floor audio contains multiple languages, you can select 'Original' instead of a real language.
- select the Latency. Choose 'Default Latency' for (slightly) more subtitle accuracy, or 'Low Latency' for a (slightly) shorter delay.
- Optionally, select the Streaming Resolutions. Clevercast will simulcast the highest resolution.
2 Configuring the event
When you press the Create button, Clevercast creates the event and redirects you to its detail page.
To add closed captions to the event, go to the Caption Languages tab. Add the first caption language, which must be the result of speech-to-text conversion. If you want to use subtitles in other language(s), add them as text-to-text translation languages.
If you are not using a (human) real-time corrector during the live stream, make sure to set 'Allow captions to be corrected' to 'No' (this will reduce the delay of the live stream). We recommend adding an AI Vocabulary to ensure that common terms for your live stream (e.g. names, acronyms, industry jargon, technical phrases ...) are correctly captured and translated.
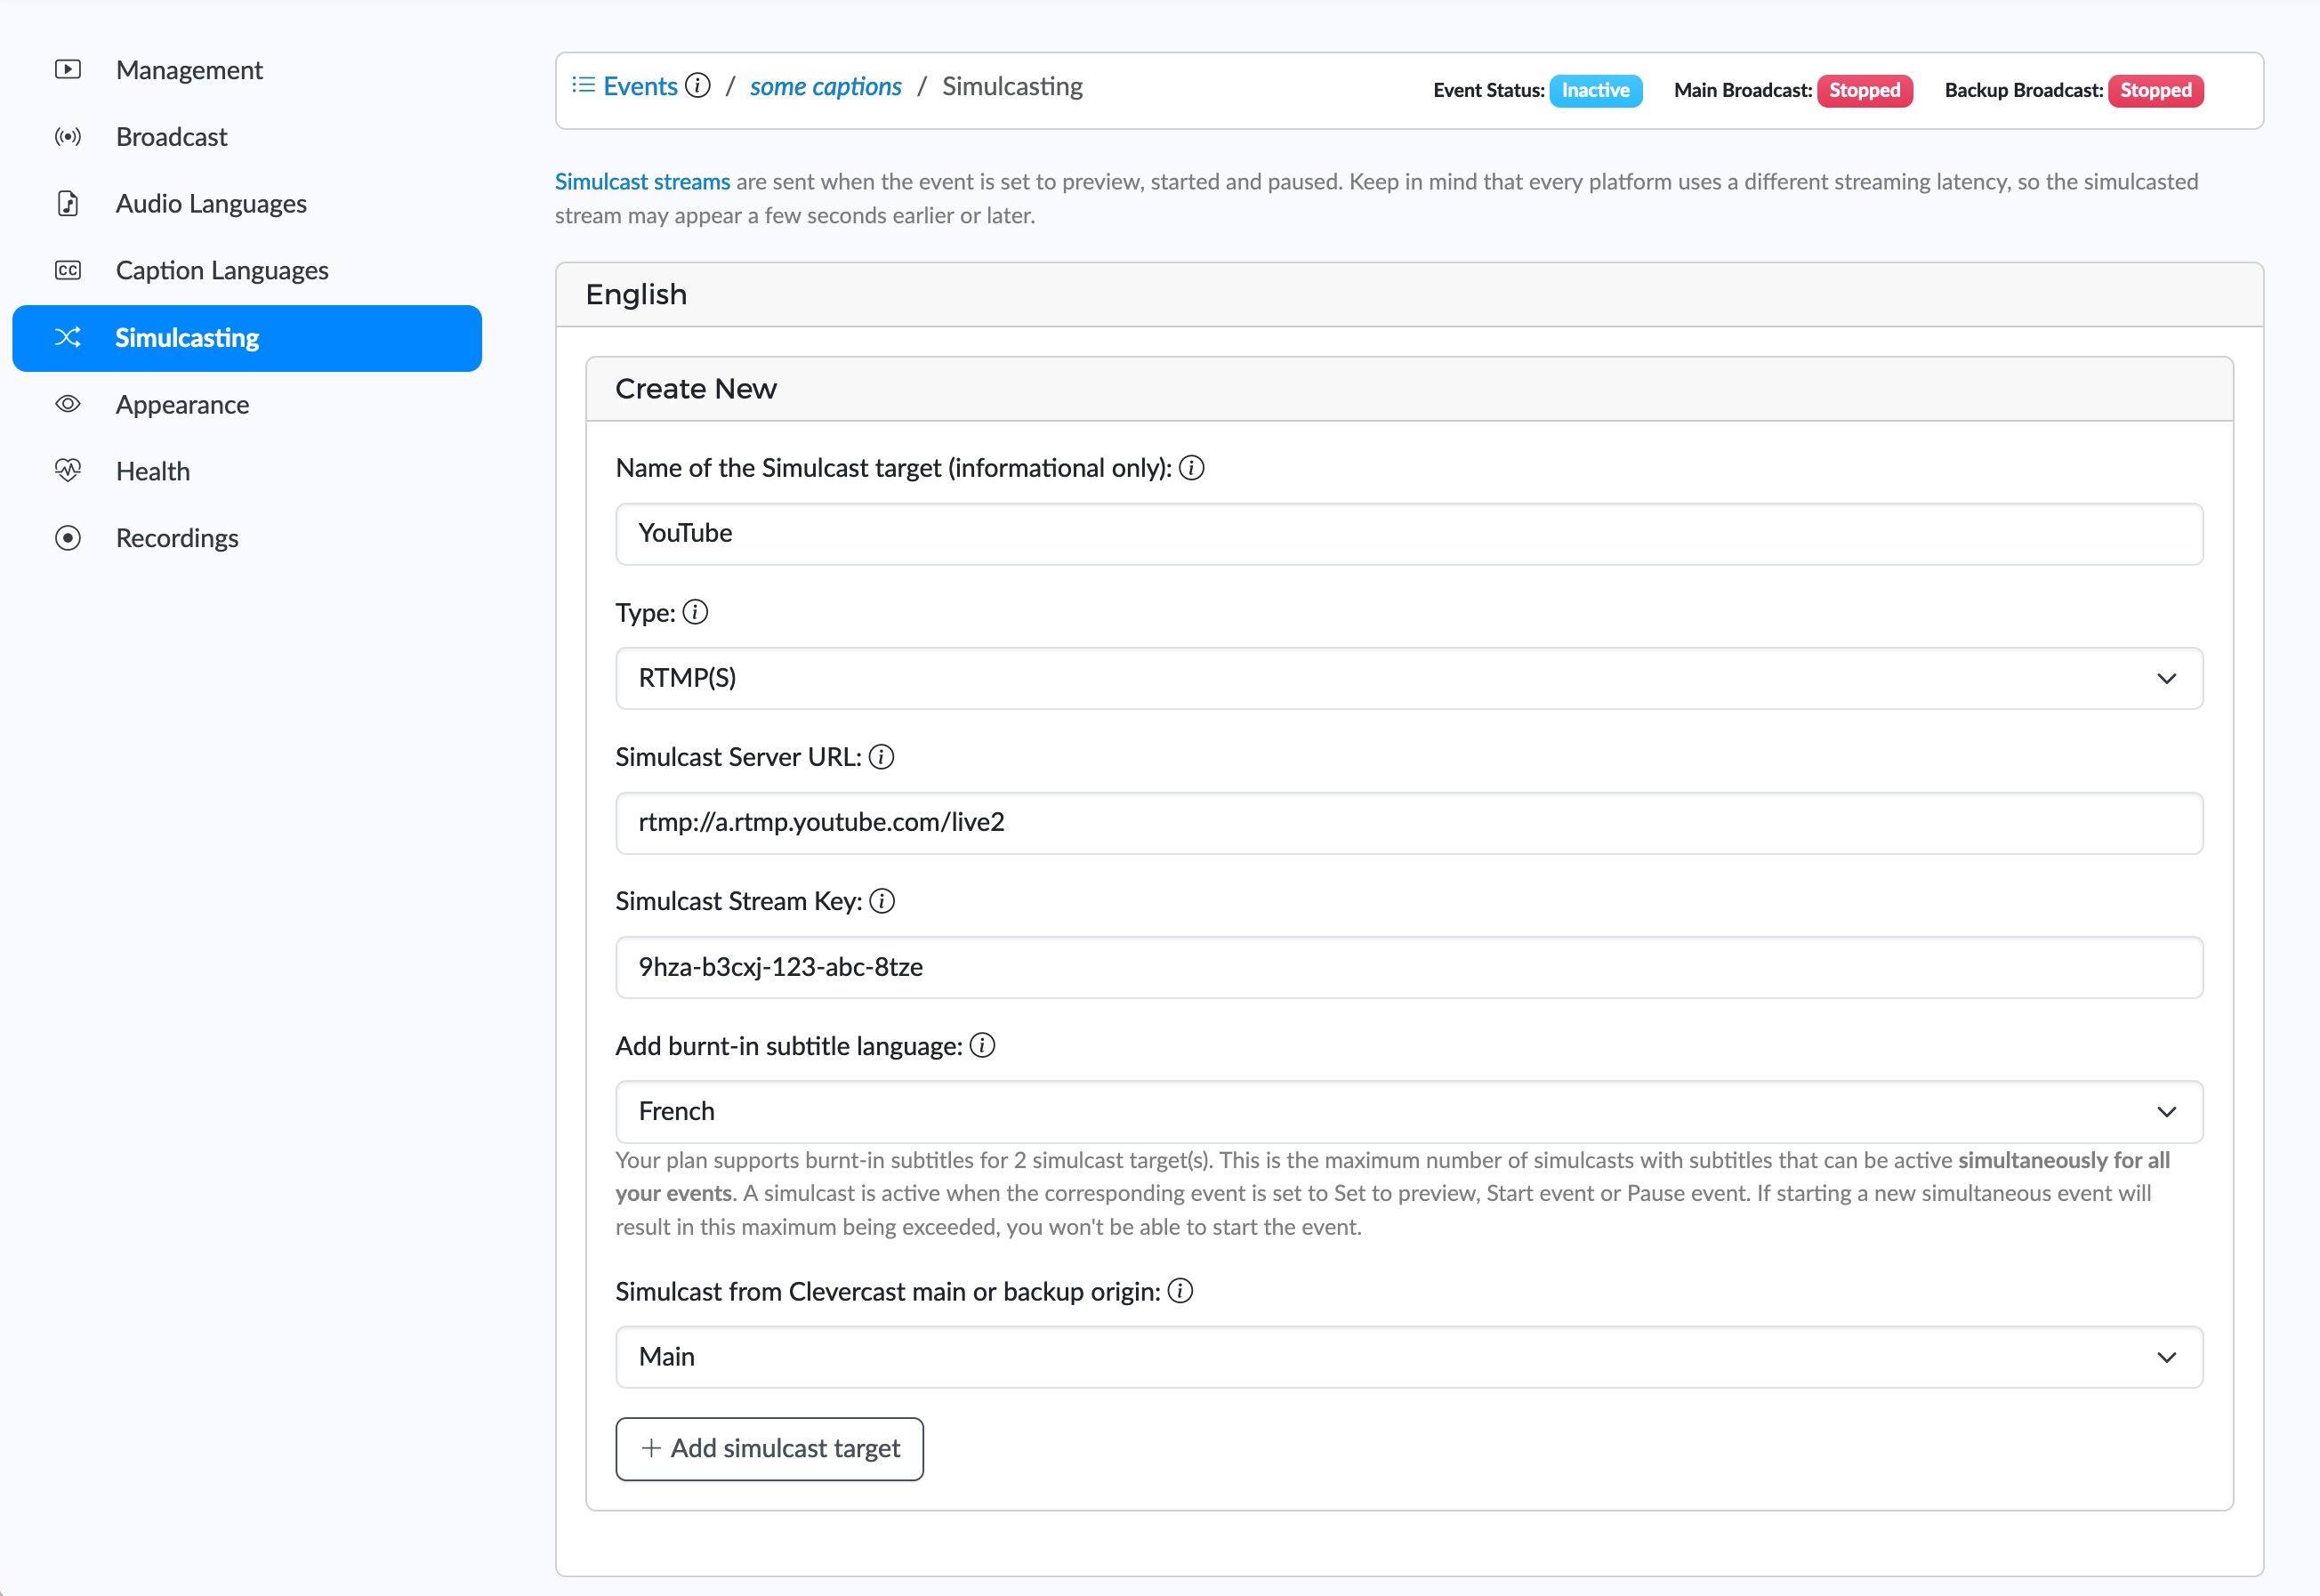
Next, go to the Simulcasting tab and add an RTMP simulcast target. Copy the Stream URL and Key from YouTube into the Simulcast Server URL and Simulcast Stream Key fields, and select the burnt-in subtitle language. Unless you're using a redundant setup, use the Main streaming server. Press 'Add simulcast target' to submit the form and create the simulcast target.
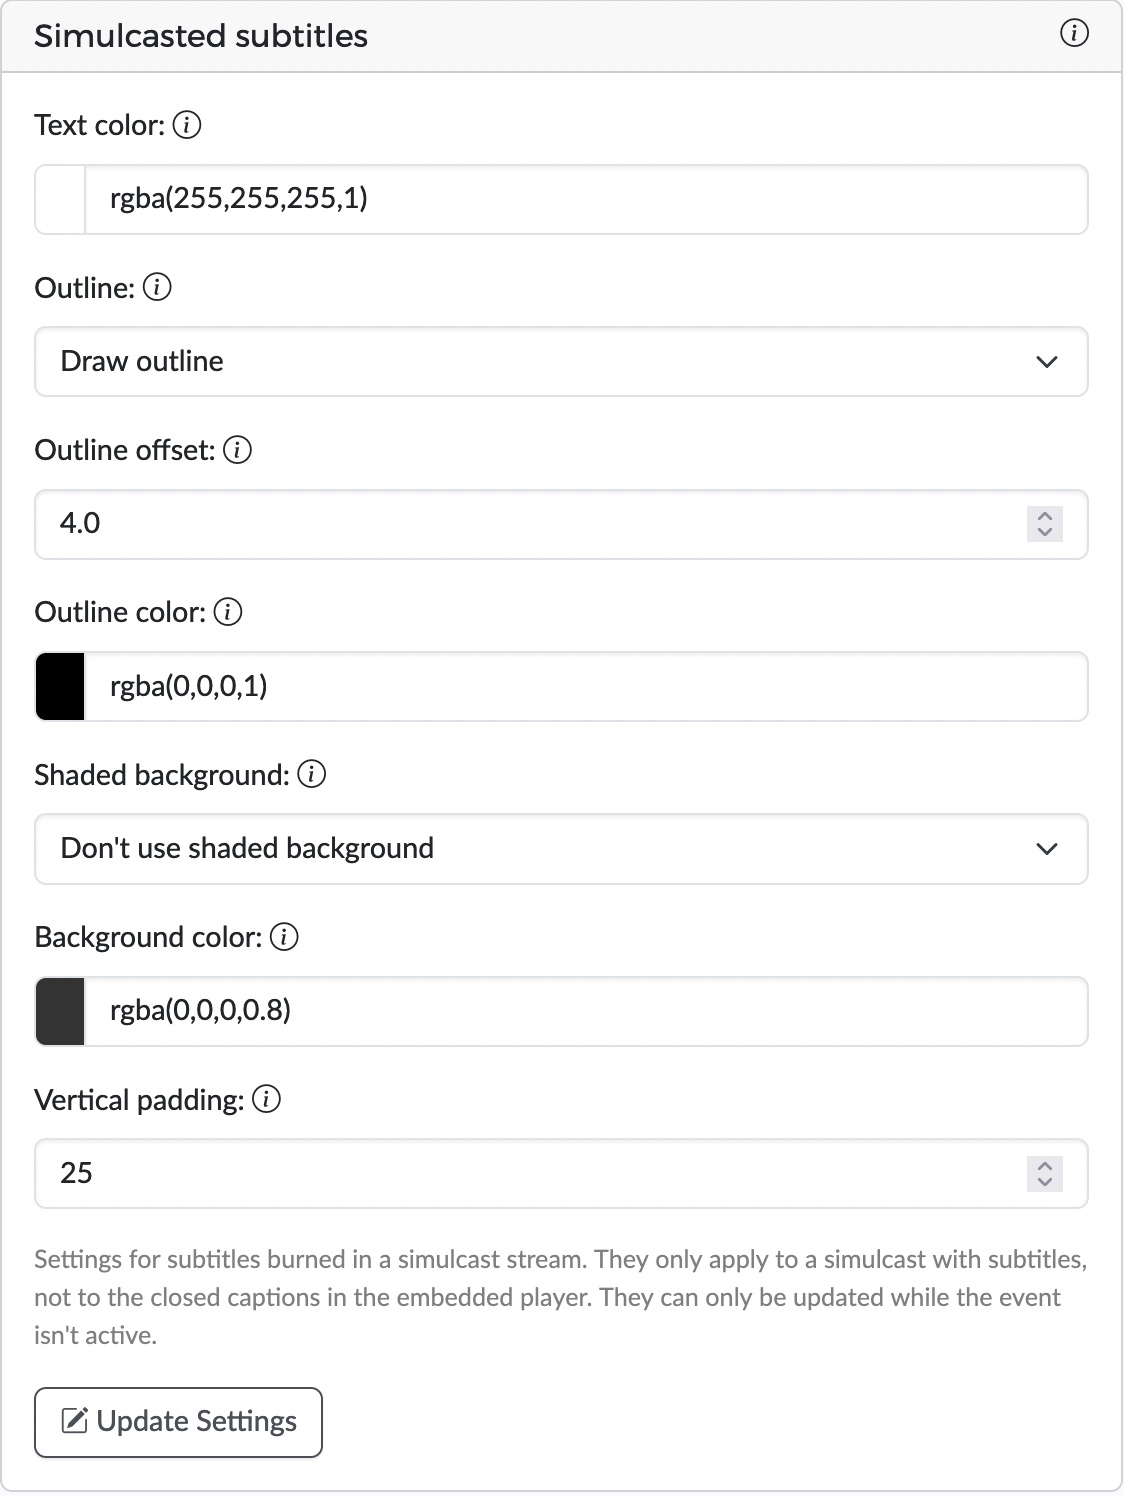
On the Appearance tab you can determine the style of the burned-in subtitles by configuring their color, position, outline and background.
You are now ready to start your live stream.
3 Test broadcast
Configure your encoder by using the settings on the Broadcast tab and our broadcast guidelines.
When you are ready to test, go to the Management tab and set the event status to Preview by pressing the Set to preview button.
Start your broadcast. Clevercast will start to process the stream and add the subtitles.
In the preview player you can see how long it takes before the live stream becomes available. Shortly after you see the stream in the Preview player, it will also show up in YouTube.
4 Starting the live stream
For simulcasting, setting your event to Preview is sufficient.
If you also use our embedded player or if you want to make a cloud recording of the video stream and closed captions, you need to set the status to Started. When the event is about to start, go the Management tab and press the Start event button. We recommend to start the event at least 4 minutes before the live action begins. When you start the event, Clevercast starts the cloud recording.
5 Stopping the live stream
After the live action has ended, wait at least 4 minutes before setting the event status to Ended, by pressing the Change Event Status button and selecting End event.
If the status was set to Started, Clevercast automatically completes the cloud recording and converts it to an MP4 file. You can download it via the Events > Recording menu, along with the WebVTT files of the closed captions.